Serve static files, add pages, and use template inheritance with Django app
Django앱으로 정적파일 제공, 페이지추가 및 템플릿 상속 사용
- Article
- 01/19/2023
In this article
- Step 3-1: Become familiar with item templates
- Step 3-2: Serve static files from your app
- Step 3-3: Add a page to the app
- Step 3-4: Use template inheritance to create a header and nav bar
Applies to:

Visual Studio

Visual Studio for Mac

Visual Studio Code
Previous step: Create a Django app with views and page templates
앞 단계에서는 HTML 페이지 1개로 최소의 Django 앱을 만드는 방법을 배웠습니다.
그러나 최신 웹앱에는 많은 페이지가 포함되어 있습니다.
최신 웹페이지는 CSS 및 JavaScript 파일 같은 공유 리소스를 사용하여 일관된 스타일과 동작을 제공합니다.
In the previous steps of the tutorial, you've learned how to create a minimal Django app with a single HTML page. Modern web apps, however, contain many pages. Modern web pages use shared resources like CSS and JavaScript files to provide consistent styling and behavior.
이 단계에서는 다음 방법을 알아봅니다:
In this step, you learn how to:
- Visual Studio 항목 템플릿을 사용, 편리한 상용구 코드로 다양한 유형의 새 파일을 빠르게 추가 Use Visual Studio item templates to quickly add new files of different types with convenient boilerplate code (step 3-1)
- 정적 파일을 제공하도록 Django 프로젝트 설정 Set up the Django project to serve static files (step 3-2)
- 앱에 추가 페이지 추가 Add additional pages to the app (step 3-3)
- 템플릿 상속을 사용하여 페이지 전체에 사용되는 헤더 및 탐색 모음 만들기 Use template inheritance to create a header and nav bar that's used across pages (step 3-4)
Step 3-1: Become familiar with item templates
항목 템플릿에 익숙해지기
Django 앱 개발할 때 일반적으로 많은 Python, HTML, CSS, JavaScript 파일을 추가.
각 파일 형식(배포에 필요할 수 있는 web.config 같은 파일)에 대해 Visual Studio는 시작하는 데 도움이 되는 편리한 item templates을 제공.
사용가능한 템플릿을 보려면 Solution Explore로 이동하여 항목을 만들려는 폴더를 마우스 오른쪽 단추로 클릭한 다음 Add > New Item을 선택합니다.
As you develop a Django app, you usually add many Python, HTML, CSS, and JavaScript files. For each file type (files like web.config that you might need for deployment), Visual Studio provides convenient item templates to get you started.
To view available templates, go to Solution Explorer, right-click the folder in which you want to create the item, and then select Add > New Item.
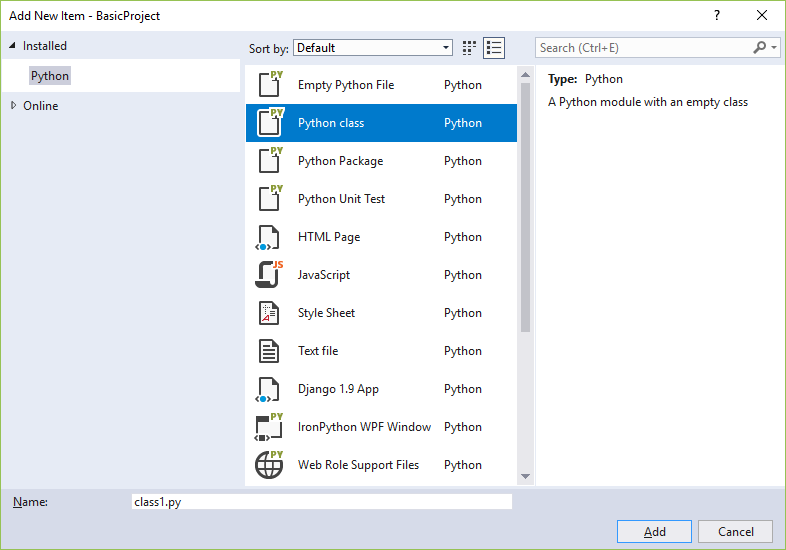
템플릿을 사용하려면 원하는 템플릿을 선택하고 파일이름 지정한 후 추가를 선택.
이 방식으로 항목을 추가하면 해당 파일이 VS 프로젝트에 자동으로 추가되고 소스제어에 대한 변경사항이 표시됩니다.
To use a template, select the desired template, specify a name for the file, and then select Add. Adding an item in this manner automatically adds the file to your Visual Studio project and marks the changes for source control.
Question: How does Visual Studio know which item templates to offer?
Visual Studio에서는 어떤 항목 템플릿을 제공할지 어떻게 알 수 있나요?
답변: Visual Studio project file (.pyproj)에는 Python 프로젝트로 표시하는 프로젝트 유형 식별자가 포함되어 있습니다.
VS에서는 유형 식별자를 사용하여 프로젝트유형에 적합한 항목 템플릿만 표시.
이런 방식으로 VS에서는 매번 정렬을 요청하지 않고도 다양한 프로젝트 유형에 대한 풍부한 항목 템플릿 집합을 제공할 수 있습니다.
The Visual Studio project file (.pyproj) contains a project type identifier that marks it as a Python project. Visual Studio uses the type identifier to show only the item templates that are suitable for the project type. This way, Visual Studio can supply a rich set of item templates for many project types without asking you to sort them every time.
Step 3-2: Serve static files from your app
앱에서 정적 파일 제공
Python(모든 프레임워크 사용)으로 구축된 웹앱에서 Python 파일은 항상 웹호스트 서버에서 실행됩니다.
또한 Python 파일은 사용자컴퓨터로 전송되지 않습니다.
그러나 CSS 및 JavaScript 같은 다른 파일은 브라우저에서만 사용됩니다.
따라서 호스트서버는 요청이 있을 때마다 이를 있는 그대로 전달합니다.
이러한 파일을 "정적" 파일이라고 하며 Django는 코드를 작성할 필요 없이 자동으로 파일을 전달할 수 있습니다.
Django 프로젝트는 Django 프로젝트의 settings.py 파일에 있는 lines 덕분에 기본적으로 앱의 static 폴더에서 정적 파일을 제공하도록 설정:
In a web app built with Python (using any framework), your Python files always run on the web host's server. The Python files are also never transmitted to a user's computer. Other files, however, such as CSS and JavaScript, are used exclusively by the browser. So, the host server simply delivers them as-is whenever they're requested. Such files are referred to as "static" files, and Django can deliver them automatically without you needing to write any code.
A Django project is set up by default to serve static files from the app's static folder, thanks to the lines in the Django project's settings.py file:
Python
# Static files (CSS, JavaScript, Images)
# https://docs.djangoproject.com/en/1.9/howto/static-files/
STATIC_URL = '/static/'
STATIC_ROOT = posixpath.join(*(BASE_DIR.split(os.path.sep) + ['static']))
원하는 폴더 구조를 사용하여 static 안의 파일을 구성한 다음, 해당 폴더 내 상대경로를 사용하여 파일을 참조할 수 있습니다.
You can organize the files within static using any folder structure that you like, and then use relative paths within that folder to refer to the files.
프로세스를 시연하려면, 아래 단계에 따라 CSS 파일을 앱에 추가한 다음, 그 스타일시트를 index.html 템플릿에서 사용:
To demonstrate the process, follow the steps below to add a CSS file to the app, then use that stylesheet in the index.html template:
Solution Explorer에서 Visual Studio 프로젝트의 HelloDjangoApp folder를 마우스오른쪽단추로 클릭하고 Add > New folder를 선택 후 폴더 이름을 static으로 지정.
In Solution Explorer, right-click the HelloDjangoApp folder in the Visual Studio project, select Add > New folder, and name the folder static.
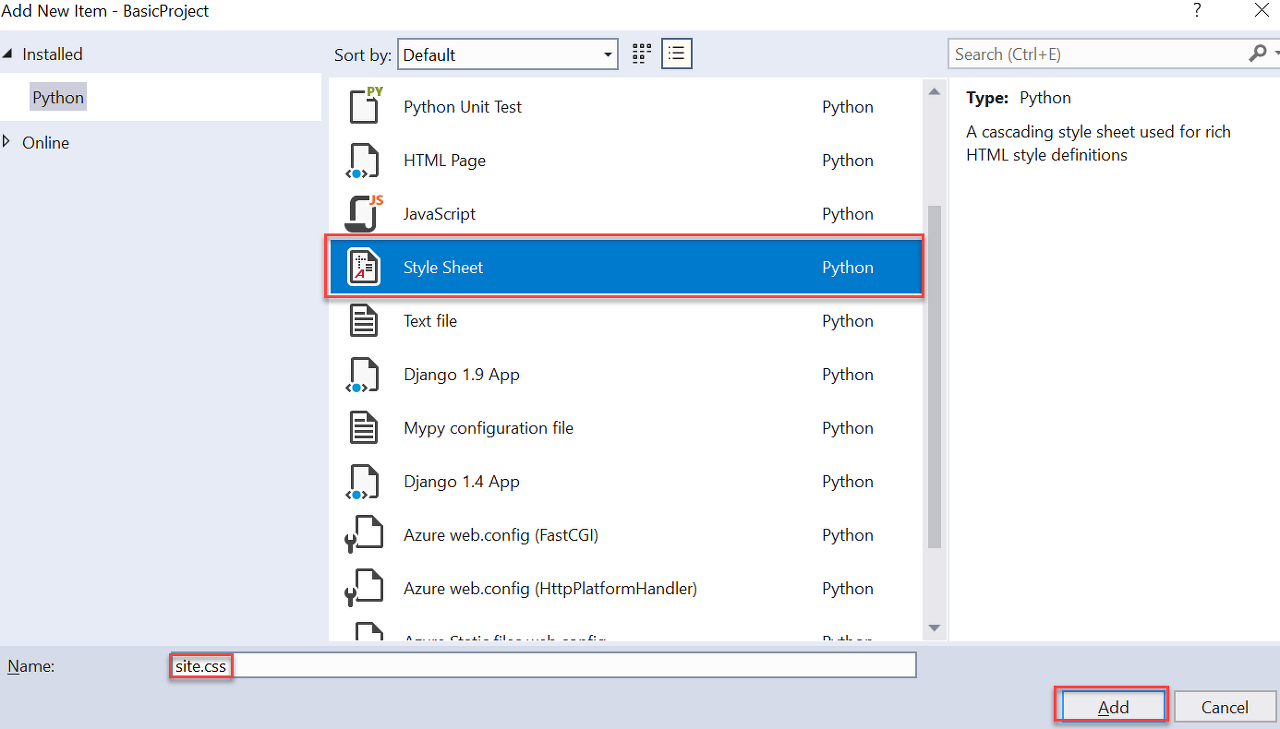
static folder를 마우스오른쪽버튼으로 클릭, Add > New item을 선택.
표시되는 대화상자에서 Stylesheet template을 선택하고, 파일이름을 site.css로 지정한 다음 Add를 선택.
Right-click the static folder and select Add > New item. In the dialog that appears, select the Stylesheet template, name the file site.css, and select Add.
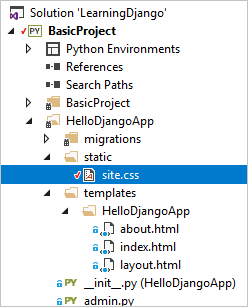
site.css 파일이 프로젝트에 나타나고 편집기에서 열립니다.
폴더 구조는 아래 이미지와 유사하게 나타나야 합니다.
The site.css file appears in the project and is opened in the editor. Your folder structure should appear similar to the below image:
site.css 파일의 내용을 다음 코드로 바꾸고 파일을 저장합니다.
Replace the contents of site.css file with the following code and save the file:
css
message {
font-weight: 600;
color: blue;
}
앱의 templates/HelloDjangoApp/index.html file 내용을 다음 코드로 바꿉니다.
코드는 2단계에서 사용된 <strong> 요소를 메시지 스타일 클래스를 참조하는 <span>으로 바꿉니다.
스타일 클래스를 사용하면 요소 스타일을 더 유연하게 지정할 수 있습니다. (VS 2017 15.7 이하 버전을 사용할 때 index.html 파일을 템플릿의 하위 폴더로 이동하지 않은 경우 2-4단계의 template namespacing를 참조)
Replace the contents of the app's templates/HelloDjangoApp/index.html file with the following code. The code replaces the <strong> element used in step 2 with a <span> that references the message style class. Using a style class gives you more flexibility in styling the element. (If you haven't moved the index.html file into a subfolder in templates when using VS 2017 15.7 and earlier, refer to template namespacing in step 2-4.)
<html>
<head>
<title>{{ title }}</title>
{% load static %} <!-- Instruct Django to load static files -->
<link rel="stylesheet" type="text/css" href="{% static 'site.css' %}" />
</head>
<body>
<span class="message">{{ message }}</span>{{ content }}
</body>
</html>
프로젝트를 실행하여 결과를 관찰하세요.
완료되면 서버를 중지하고 원하는 경우 변경사항을 소스 제어에 커밋합니다(2단계에서 설명한 대로).
Run the project to observe the results. When you're done, stop the server and commit your changes to source control if you like (as explained in step 2).
Question: What is the purpose of the {% load static %} tag?
{% load static %} 태그의 목적은?
답변: <head> 및 <body> 같은 요소에서 정적 파일을 참조하기 전에 {% load static %} 행이 필요.
이 섹션에 표시된 예에서 "정적 파일"은 사용자 정의 Django 템플릿 태그 세트를 참조하며, 이를 통해 {% static %} 구문을 사용하여 정적 파일을 참조할 수 있습니다. {% load static %}가 없으면 앱이 실행될 때 예외가 표시됩니다.
Answer: The {% load static %} line is required before referring to static files in elements like <head> and <body>. In the example shown in this section, "static files" refers to a custom Django template tag set, which allows you to use the {% static %} syntax to refer to static files. Without {% load static %}, you'll see an exception when the app runs.
Question: Are there any conventions for organizing static files?
정적 파일을 구성하는 규칙이 있나요?
원하는 방식으로 정적 폴더에 다른 CSS, JavaScript, HTML 파일을 추가할 수 있습니다.
정적 파일을 구성하는 일반적 방법은 글꼴, 스크립트 및 콘텐츠(스타일시트 및 기타 파일용)라는 이름의 하위 폴더를 만드는 것입니다.
각각의 경우에 {% static %} 참조의 상대 파일 경로에 해당 폴더를 포함시키는 것을 잊지 마십시오.
Answer: You can add other CSS, JavaScript, and HTML files in your static folder the way you want. A typical way to organize static files is to create subfolders named fonts, scripts, and content (for stylesheets and any other files). In each case, remember to include those folders in the relative file path in {% static %} references.
Question: Can I complete the same task without using the {% load static %} tag?
{% load static %} 태그를 사용하지 않고 동일한 작업을 완료할 수 있나요?
Answer: Yes, you can.
답변: 예, 가능합니다.
HTML
<html>
<head>
<title>{{ title }}</title>
<link rel="stylesheet" type="text/css" href="../../static/site.css" />
</head>
<body>
<span class="message">{{ message }}</span>{{ content }}
</body>
</html>
Step 3-3: Add a page to the app
앱에 페이지 추가
앱에 다른 페이지를 추가하면:
Adding another page to the app will:
- view를 정의하는 Python 함수 추가 Add a Python function that defines the view.
- 페이지의 마크업에 대한 템플릿 추가 Add a template for the page's markup.
- Django 프로젝트의 urls.py 파일에 필요한 라우팅 추가 Add the necessary routing to the Django project's urls.py file.
다음 단계에서는 "HelloDjangoApp" 프로젝트에 "About" 페이지를 추가하고 홈페이지에서 해당 페이지에 대한 링크를 추가:
The following steps add an "About" page to the "HelloDjangoApp" project, and links to the page from the home page:
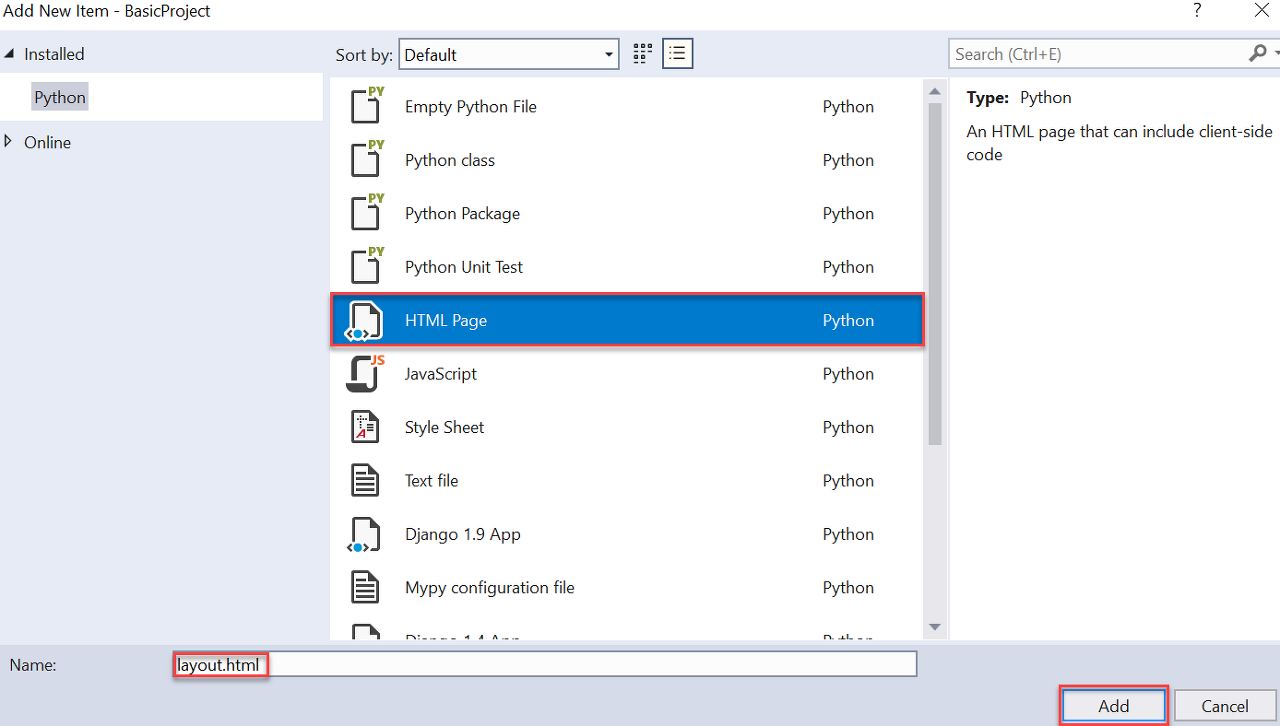
Solution Explorer에서 templates/HelloDjangoApp folder를 마우스오른쪽 클릭.
Add > New item을 선택, HTML Page item template 선택.
파일 이름을 about.html로 지정하고 Add를 선택.
In Solution Explorer, right-click the templates/HelloDjangoApp folder. Select Add > New item and select the HTML Page item template. Name the file about.html and select Add.

Tip
New Item command이 Add menu에 표시되지 않으면, Visual Studio가 디버깅 모드를 종료하도록 서버를 중지했는지 확인하세요.
about.html의 내용을 아래 마크업으로 바꿉니다(3-4단계에서 홈 페이지에 대한 명시적 링크를 간단한 탐색 모음으로 바꿉니다).
If the New Item command doesn't appear on the Add menu, ensure that you have stopped the server so that Visual Studio exits debugging mode.
Replace the contents of about.html with the markup below (you replace the explicit link to the home page with a simple navigation bar in step 3-4):
HTML
<html>
<head>
<title>{{ title }}</title>
{% load static %}
<link rel="stylesheet" type="text/css" href="{% static 'site.css' %}" />
</head>
<body>
<div><a href="home">Home</a></div>
{{ content }}
</body>
</html>
앱의 views.py 파일을 열고 템플릿을 사용하는 about이라는 함수를 추가:
Open the app's views.py file and add a function named about that uses the template:
Python
def about(request):
return render(
request,
"HelloDjangoApp/about.html",
{
'title' : "About HelloDjangoApp",
'content' : "Example app page for Django."
}
)
Django 프로젝트의 urls.py 파일을 열고 urlPatterns 배열에 다음 줄을 추가:
Open the Django project's urls.py file and add the following line to the urlPatterns array:
Python
re_path(r'^about$', HelloDjangoApp.views.about, name='about'),
template/HelloDjangoApp/index.html 파일을 열고 <body> 요소 아래에 다음 줄을 추가하여 정보 페이지에 연결(3-4단계에서 이 링크를 다시 탐색 모음으로 대체합니다):
Open the templates/HelloDjangoApp/index.html file and add the following line below the <body> element to link to the About page (you'll again replace this link with a nav bar in step 3-4):
HTML
<div><a href="about">About</a></div>
파일 > 모두 저장 메뉴 명령을 사용하여 모든 파일을 저장하거나 Ctrl+Shift+S를 누르십시오. (기술적으로 Visual Studio에서 프로젝트를 실행하면 파일이 자동으로 저장되므로 이 단계는 필요하지 않습니다. 그럼에도 불구하고 알아두면 좋은 명령입니다.)
Save all the files using the File > Save All menu command, or just press Ctrl+Shift+S. (Technically, this step isn't needed as running the project in Visual Studio saves files automatically. Nevertheless, it's a good command to know about.)
프로젝트를 실행하여 결과를 관찰하고 페이지 간 탐색을 확인합니다.
완료되면 서버를 닫습니다.
Run the project to observe the results and check the navigation between pages. When you're done, close the server.
질문: 홈 페이지 링크로 "index"을 사용해 보았지만 작동하지 않았습니다. 왜?
I tried using "index" for the link to the home page, but it didn't work. Why?
답변: views.py 파일의 view 함수 이름이 index라고 하더라도 Django 프로젝트의 urls.py 파일에 있는 URL 라우팅 패턴에는 "index" 문자열과 일치하는 정규식이 포함되어 있지 않습니다.
문자열을 일치시키려면 ^index$ 패턴에 대한 다른 항목을 추가해야 합니다.
다음 섹션에서 볼 수 있듯이 패턴 이름을 참조하려면 페이지 템플릿에서 {% url '<pattern_name>' %} 태그를 사용하는 것이 좋습니다.
이 경우 Django는 적절한 URL을 생성합니다.
예를 들어 about.html의 <div><a href="home">Home</a></div>을 <div><a href="{% url 'index' %}">Home</div>으로 바꾸세요.
a></div>. 여기서 'index'를 사용하는 것은 urls.py의 첫 번째 URL 패턴이 실제로 (name='index' 인수로 인해) 'index'로 명명되었기 때문에 작동합니다.
'home'을 사용하여 두 번째 패턴을 참조할 수도 있습니다.
Answer: Even though the view function in views.py file is named index, the URL routing patterns in the Django project's urls.py file doesn't contain a regular expression that matches the string "index". To match the string, you need to add another entry for the pattern ^index$.
As shown in the next section, it's better to use the {% url '<pattern_name>' %} tag in the page template to refer to the name of a pattern. In that case, Django creates the proper URL for you. For example, replace <div><a href="home">Home</a></div> in about.html with <div><a href="{% url 'index' %}">Home</a></div>. The use of 'index' works here because the first URL pattern in urls.py is, in fact, named 'index' (by virtue of the name='index' argument). You can also use 'home' to refer to the second pattern.
Step 3-4: Use template inheritance to create a header and nav bar
템플릿 상속을 사용하여 헤더 및 탐색 모음 만들기
최신 웹앱은 각 페이지에 명시적 navigation links를 두는 대신 branding header와 navigation bar을 사용.
navigation bar은 가장 중요한 페이지 링크, 팝업 메뉴 등을 제공.
헤더와 navigation bar이 모든 페이지에서 동일하도록 하려면 모든 페이지 템플릿에서 동일한 코드를 반복하지 마세요.
대신 모든 페이지의 공통 부분을 한 곳에서 정의하고 싶습니다.
Django의 템플릿 시스템은 여러 템플릿에서 특정 요소를 재사용하기 위한 2가지 방법, 즉 포함과 상속을 제공.
Instead of having explicit navigation links on each page, modern web apps use a branding header and a navigation bar. A navigation bar provides the most important page links, popup menus, and so on. To ensure that the header and nav bar are the same across all pages, don't repeat the same code in every page template. You instead want to define the common parts of all your pages in one place.
Django's template system provides two means for reusing specific elements across multiple templates: includes and inheritance.
Includes 은 {% include <template_path> %} 구문을 사용하여 참조 템플릿의 특정 위치에 삽입하는 다른 페이지 템플릿입니다.
코드에서 경로를 동적으로 변경하려는 경우 변수를 사용할 수도 있습니다.
Includes은 페이지의 특정 위치에 공유 템플릿을 가져오기 위해 페이지 본문에 사용됩니다.
Includes are other page templates that you insert at a specific place in the referring template using the syntax {% include <template_path> %}. If you want to change the path dynamically in code, you can also use a variable. Includes are used in the body of a page to pull in the shared template at a specific location on the page.
상속 Inheritance은 페이지 템플릿 시작부분에서
{% extends <template_path> %} 를 사용하여 참조 템플릿이 구축되는 공유 기본 템플릿을 지정합니다.
상속은 일반적으로 공유 레이아웃, 탐색 모음 및 앱 페이지의 기타 구조를 정의하는 데 사용됩니다.
따라서 참조 템플릿은 블록이라는 기본 템플릿의 특정 영역만 추가하거나 수정할 수 있습니다.
Inheritance uses the {% extends <template_path> %} at the beginning of a page template to specify a shared base template that the referring template then builds upon. Inheritance is commonly used to define a shared layout, nav bar, and other structures for an app's pages, such that referring templates can only add or modify specific areas of the base template called blocks.
두 경우 모두 <template_path>는 앱의 템플릿 폴더에 상대적(../ 또는 ./도 허용됨).
In both cases, <template_path> is relative to the app's templates folder (../ or ./ are also allowed).
기본 템플릿은 {% block <block_name> %} 및 {% endblock %} 태그를 사용하여 블록을 묘사합니다.
참조 템플릿이 동일한 블록 이름을 가진 태그를 사용하는 경우 해당 블록 내용이 기본 템플릿의 내용을 재정의합니다.
A base template delineates blocks using {% block <block_name> %} and {% endblock %} tags. If a referring template then uses tags with the same block name, its block content overrides that of the base template.
다음 단계에서는 상속을 보여줍니다.
The following steps demonstrate inheritance:
앱의 templates/HelloDjangoApp folder에서 새 HTML 파일을 만듭니다. templates/HelloDjangoApp folder를 마우스오른쪽버튼 클릭하고 Add > New item을 선택한 다음 HTML Page item template을 선택.
파일 이름을 layout.html로 지정하고 Add를 선택.
In the app's templates/HelloDjangoApp folder, create a new HTML file. Right-click the templates/HelloDjangoApp folder, select Add > New item and then select the HTML Page item template. Name the file layout.html and select Add.
레이아웃.html 파일의 콘텐츠를 아래 마크업으로 바꾸세요.
이 템플릿에는 모든 참조 페이지에서 교체해야 하는 "content"라는 블록이 포함되어 있는 것을 볼 수 있습니다.
Replace the layout.html file's content with the markup below. You can see that this template contains a block named "content" that is all the referring pages need to replace:
HTML
<!DOCTYPE html>
<html>
<head>
<meta charset="utf-8" />
<title>{{ title }}</title>
{% load static %}
<link rel="stylesheet" type="text/css" href="{% static 'site.css' %}" />
</head>
<body>
<div class="navbar">
<a href="/" class="navbar-brand">Hello Django</a>
<a href="{% url 'home' %}" class="navbar-item">Home</a>
<a href="{% url 'about' %}" class="navbar-item">About</a>
</div>
<div class="body-content">
{% block content %}{% endblock %}
<hr/>
<footer>
<p>© 2023</p>
</footer>
</div>
</body>
</html>
앱의 static/site.css 파일에 다음 스타일을 추가합니다(이 연습에서는 여기서 반응형 디자인을 보여주려는 것이 아닙니다. 이러한 스타일은 단순히 흥미로운 결과를 생성하기 위한 것입니다).
Add the following styles to the app's static/site.css file (this walkthrough isn't attempting to demonstrate responsive design here; these styles are simply to generate an interesting result):
CSS
.navbar {
background-color: lightslategray;
font-size: 1em;
font-family: 'Trebuchet MS', 'Lucida Sans Unicode', 'Lucida Grande', 'Lucida Sans', Arial, sans-serif;
color: white;
padding: 8px 5px 8px 5px;
}
.navbar a {
text-decoration: none;
color: inherit;
}
.navbar-brand {
font-size: 1.2em;
font-weight: 600;
}
.navbar-item {
font-variant: small-caps;
margin-left: 30px;
}
.body-content {
padding: 5px;
font-family:'Segoe UI', Tahoma, Geneva, Verdana, sans-serif;
}
기본 템플릿을 참조하고 페이지 내에서 사용할 수 있도록 template/HelloDjangoApp/index.html 파일을 수정하세요.
HTML 페이지(html 태그 위)의 라인 1에 다음 줄을 추가합니다.
Modify the templates/HelloDjangoApp/index.html file to refer to the base template and make it usable within the page. Add the following line as line 1 in the HTML page (above the html tag):
HTML
{% extends "HelloDjangoApp/layout.html" %}
상속을 사용하면 이 템플릿이 본문 태그 내에서 구현되어 콘텐츠 블록을 재정의하는 것이 간단해지는 것을 볼 수 있습니다.
You can see that by using inheritance, this template becomes simple to implement within the body tag to override the content block:
HTML
{% block content %} <span class="message">{{ message }}</span>{{ content }} {% endblock %}
레이아웃 템플릿을 사용할 수 있도록 동일한 방법으로 template/HelloDjangoApp/about.html 파일을 수정합니다.
HTML 페이지(html 태그 위에)의 1단계에서 동일한 줄을 추가합니다.
Modify the templates/HelloDjangoApp/about.html file in the same way to make the layout template available. Add the same line from step 1 in the HTML page (above the html tag):
HTML
{% extends "HelloDjangoApp/layout.html" %}
그런 다음 상속을 사용하여 body 태그 내에 템플릿을 구현하여 콘텐츠 블록을 재정의합니다.
Then, using inheritance, implement the template within the body tag to override the content block:
HTML
{% block content %}
{{ content }}
{% endblock %}
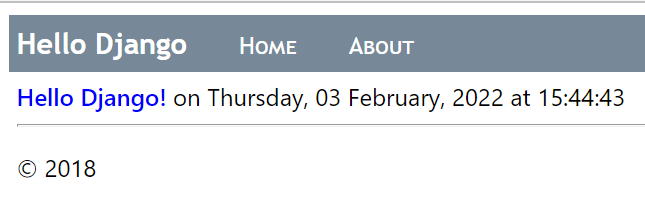
서버를 실행하여 결과를 관찰합니다.
완료되면 서버를 닫습니다.
Run the server to observe the results. When you're done, close the server.
앱을 크게 변경했으므로 이제 변경 사항을 소스 제어에 커밋하는 것이 좋습니다.
Because you'd made substantial changes to the app, it's again a good time to commit your changes to source control.
Next steps
Use the full Django Web Project template
Go deeper
첫 번째 Django 앱 작성, 3부(보기)(docs.djangoproject.com)
제어 흐름과 같은 Django 템플릿의 추가 기능은 Django 템플릿 언어(docs.djangoproject.com)를 참조하세요.
{% url %} 태그 사용에 대한 자세한 내용은 Django 템플릿 참조용 내장 템플릿 태그 및 필터 내의 url을 참조하세요(docs.djangoproject.com).
GitHub의 튜토리얼 소스 코드: Microsoft/python-sample-vs-learning-django
- Writing your first Django app, part 3 (views) (docs.djangoproject.com)
- For more capabilities of Django templates, such as control flow, see The Django template language (docs.djangoproject.com)
- For complete details on using the {% url %} tag, see url within the Built-in template tags and filters for Django templates reference (docs.djangoproject.com)
- Tutorial source code on GitHub: Microsoft/python-sample-vs-learning-django
댓글